background

Saturday, March 31, 2012

MFT Wednesday Stamp Club Sketch

Hello Bloggers,


I hope you all are enjoying your weekend; it's already half over.  Oh why, does it go by sooo fast.  Tonight's share is the first of many birthday cards that I'll be creating over the next few weeks.  I have tons of birthday's starting in April and going through June.


I decided to follow a sketch from the My Favorite Things Wednesday Stamp Club.  The stamp is a set, a la modes Birthday Girl, that I picked up from MFT a few months ago.  I love all the sentiments that go along with her.  I decided to break away from the bright, springy colors I've been using lately and go with gray and yellow, one of my faves.  


Toodles for now.  Have a great evening!


Supply List:
Cardstock:  CC Designs Copic Quality, Bazzil
Papers:  MME Portobello Road, K&Company Julianne
Spellbinders Floral Accent Die's
Ink:  Tuxedo Memento Black, Distress Ink and Stain in Pumice Stone
Stick Pin from Making Memories
crochet flower (I made it)
rose buds, pearls and seam binding from my stash
Copic Markers:
Skin:  E000, E00, E11, R00, R20
Hair:  E25, E31, E50
Dress:  N1, N3, N5
Gloves:  E40, colorless blender
Cupcake:  Y21, Y23, Y26, Y32, Y02, E57, E59, E30, E31, E33
Shoes:  C5, C7, C9

Thursday, March 29, 2012

Happy Birthday Christy!

Hello Bloggers,


Today's card is birthday card that I created for the Tiddly Inks Challenge #83-Birthday Bash! in celebration of the owner and creator of Tiddly Inks, Christy.  I had to use another adorable Wryn image.  I absolutely love these images.  They are so fun to color up and fit just about any occasion.  Make sure you check out the Tiddly Inks Challenge blog today for a chance to win some gift certificates.


For the card, I used my supplies that I received in my Simon Says Stamp April Card Kit.  I love all of the bright, springy papers.  That's it for now - have a great rest of the week, it's almost Friday!!


I made the banner from washi tape (aka paper tape) that came in the card kit.  I got the idea from TeriBeri's Creations.  Make sure you check her out, she has video on how to make it as well as some other great ideas for washi tape. Everything but the floss and the little buttons came in the card kit.

Copics Used:

Skin:  E000, E00, E11, R00, R20
Hair:  E30, E31, E33, E35
Clothes:  BV01, BV02, BV04, BV23, BV25, R02, R14, colorless blender
Shoes:  C3, C5, C7, C9
Flowers:  YR20, YR21, R02, R14, R17

Monday, March 26, 2012

Creative Chemistry 101

Hello Bloggers,


I enrolled in Tim Holtz's Creative Chemistry 101 online class, which started last Monday.  It's now Sunday night and I've just have now been able to start the class.  Thankfully, it is a self-paced class and I have unlimited access to the site, videos and downloads, but would really like to take part in the chats and forums that take place during the 2 weeks of class.  But as we all know, life does sometimes get in the way...anywho, I was able to complete the lessons for day #2.  Day #1 was an introduction by Tim.  I thought I would share my tags that show the techniques we learned.  It's not too late to sign up, there's still have another week to go.  Here's the link if you're interested:  Creative Chemistry 101 Registration.


Hope you all have a good week and I hope to be able to post some more creations from the class later in the week.  Nighty, night!


Saturday, March 24, 2012

The Deconstructed Sketch No. 44

Hello Bloggers,


Finally Friday!!  This was a long week and I'm looking forward to the weekend.  It's super late right now, it's actually Saturday morning, but I wanted to post this Easter card I finished up tonight.  I did this in record time for me; started it last night and finished it up tonight after dinner.  I spent more time trying to design a watermark than I did on the card.  I finally got it to work, but have a bit more tweaking to do before I get it just right, but this will work for the time-being.  On to the card...  this is my take on sketch 44 from deconstructingjen's blog.  I decided to flip it around and go vertical instead of horizontal.  I've had this cute little digi for quite some time.  Her name is Bonnie and I got her from speschstamps.com.


Hope you all have a good evening or should I say morning!  Toodles.


The papers are from My Mind's Eye, Lost& Found-Market Street.  I used some lace and pearls  from my stash and pulled out the sewing machine again.  My stitches are getting a bit better.  Practice makes perfect.

I colored Bonnie up with my copics and paper pieced her little bunny.


Wednesday, March 21, 2012

Another Sketch Completed

Hello Bloggers,


Another quick post to share the latest deconstructed sketch that I completed.  I always struggle with the layout of a card, but by following these wonderful sketches, I'm able to get my cards complete and hopefully build up my stash of completed cards.  This is another adorable Wryn image from Tiddly Inks. For this card, not only did I follow the sketch, but I also am following a challenge over on the Tiddly Inks Challenge blog.  The theme is "Best Friends Forever" and I thought Wryn and company fit the sentiment nicely.  


I still have the pics of my room that need posting and I'll try my best to get some up very soon, but in the meantime, you all have a great evening.


I used My Minds Eye "Blink of an Eye" cardstock and colored her up with my copics.  The sentiment is from Inkadinkado "Tell it Like it Is".


Wednesday, March 14, 2012

My Second Challenge

Hello Bloggers,


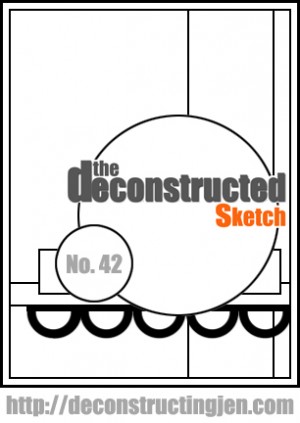
Just a quick post this evening.  I just finished up a card as part of The Deconstructed Sketch Challenge #42.  I got this lovely stamp the other day in the mail and just had to color her up.  I also had the perfect coffee themed sentiment stamps to go along with her.  The stamp is "Coffee Kiki La Rue" from All That Scraps.  Isn't she adorable?  The sentiment is from a TPC Studio set, "Coffee Cafe" that I got from Joann's quite a while ago.


Hope to post more this weekend, maybe even those long awaited craft room pictures.  Have a good one!


I used a new 6x6 paper stack from Fancy Pants Designs; "It's the Little Things".  I actually did a bit of sewing and added some Prima lace from my stash.


Wednesday, March 7, 2012

Tags 11 and 12

Hello Bloggers,

Well, this is definitely "better late than never".  I've finally completed tag #12 in the 12 Tags of Christmas.  I also realized that though I had completed #11 back in December, I had never actually posted it, so tonight I thought I would share the last two tags.

Tag #12 was a recent completion.  I had started it in late December after Christmas, but finishing was delayed until I had completed my craftroom revamp.  When I saw this adorable digi image back in December, I knew I wanted to use it on this tag in place of the fractured doll that Tim used.  She is so adorable!
I was so fortunate that I was able to participate last year and that became even more apparent when Tim announced a few weeks ago, that 2011 was the last "12 Tags of Christmas", but fear not!  Tim will now be doing the 12 Tags of 2012.  
Without further ado, here's number 11 and 12.  You can also view all 12 tags HERE. Hope you all enjoy your evening.


Tag #12

Oh, how I love this tag.  This adorable digi image is from Saturated Canary Digis.  I did alter her a bit by cutting off her wings (ouch, I hope it didn't hurt too much) and replaced them with some clay wings that I made with some molds I got a while ago.  The image, which was colored with my copics,  was a sub for the fractured doll that Tim used (I'll tell you a secret, I really don't like those little dolls, shh), the rest of tag pretty much follows Tim's recipe.  Here are the step-by-step instructions if you're interested.  I did not have the tissue paper that Tim used, so I made my own.  I thing it came out pretty good!

Tag #11
This one was a challenge... I didn't have the glossy paper nor any of the stamps Tim used.  I ended up using photo paper and though the result is very similar to Tim's, using photo paper with inks is tough.  The photo paper inherently wants to absorb the ink, so there's not much time to blend the ink.  The embellies in the corner were made with shrinky dinks, Ultra Thick Embossing Enamel (aka UTEE) and a melting pot.  Since I didn't have a melting pot, I used an old fondue pot to melt the UTEE.  Worked like a charm.  Here's the step-by-step instructions.

Monday, March 5, 2012

Non Traditional Easter Card

Hello Bloggers,


I've definitely been MIA for a spell.  I've finally finished my craft room redesign.  I have a bit more organizing to do and will post the promised pics once that's complete.  However, I had to take a break from all of the painting, putting furniture and storage together to do some crafting.  


Tonight's share is an Easter I made over the weekend.  I followed a sketch design from deconstructingjen.  I've decided to try to create at least one card a week using weekly sketches from her site. I've also recently signed up for a monthly card kit from simonsaysstamp.com.  All of the elements on the card are from the March kit.  Between the wonderful sketches from Jen's site and the great supplies from monthly kit, I'm sure to build up my card stash.


The colors are a bit non-traditional, but I enjoyed the challenge.  The image is Wryn-somebunny-loves-you from Tiddly Inks.  She's a digi image and is just adorable.  I have a couple other Wryn images that I've purchased and can't wait to color up, so stay tuned.


Related Posts Plugin for WordPress, Blogger...